Setup Highly Available AWS VPC with Private & Public Subnets by Terrafom
Prologue
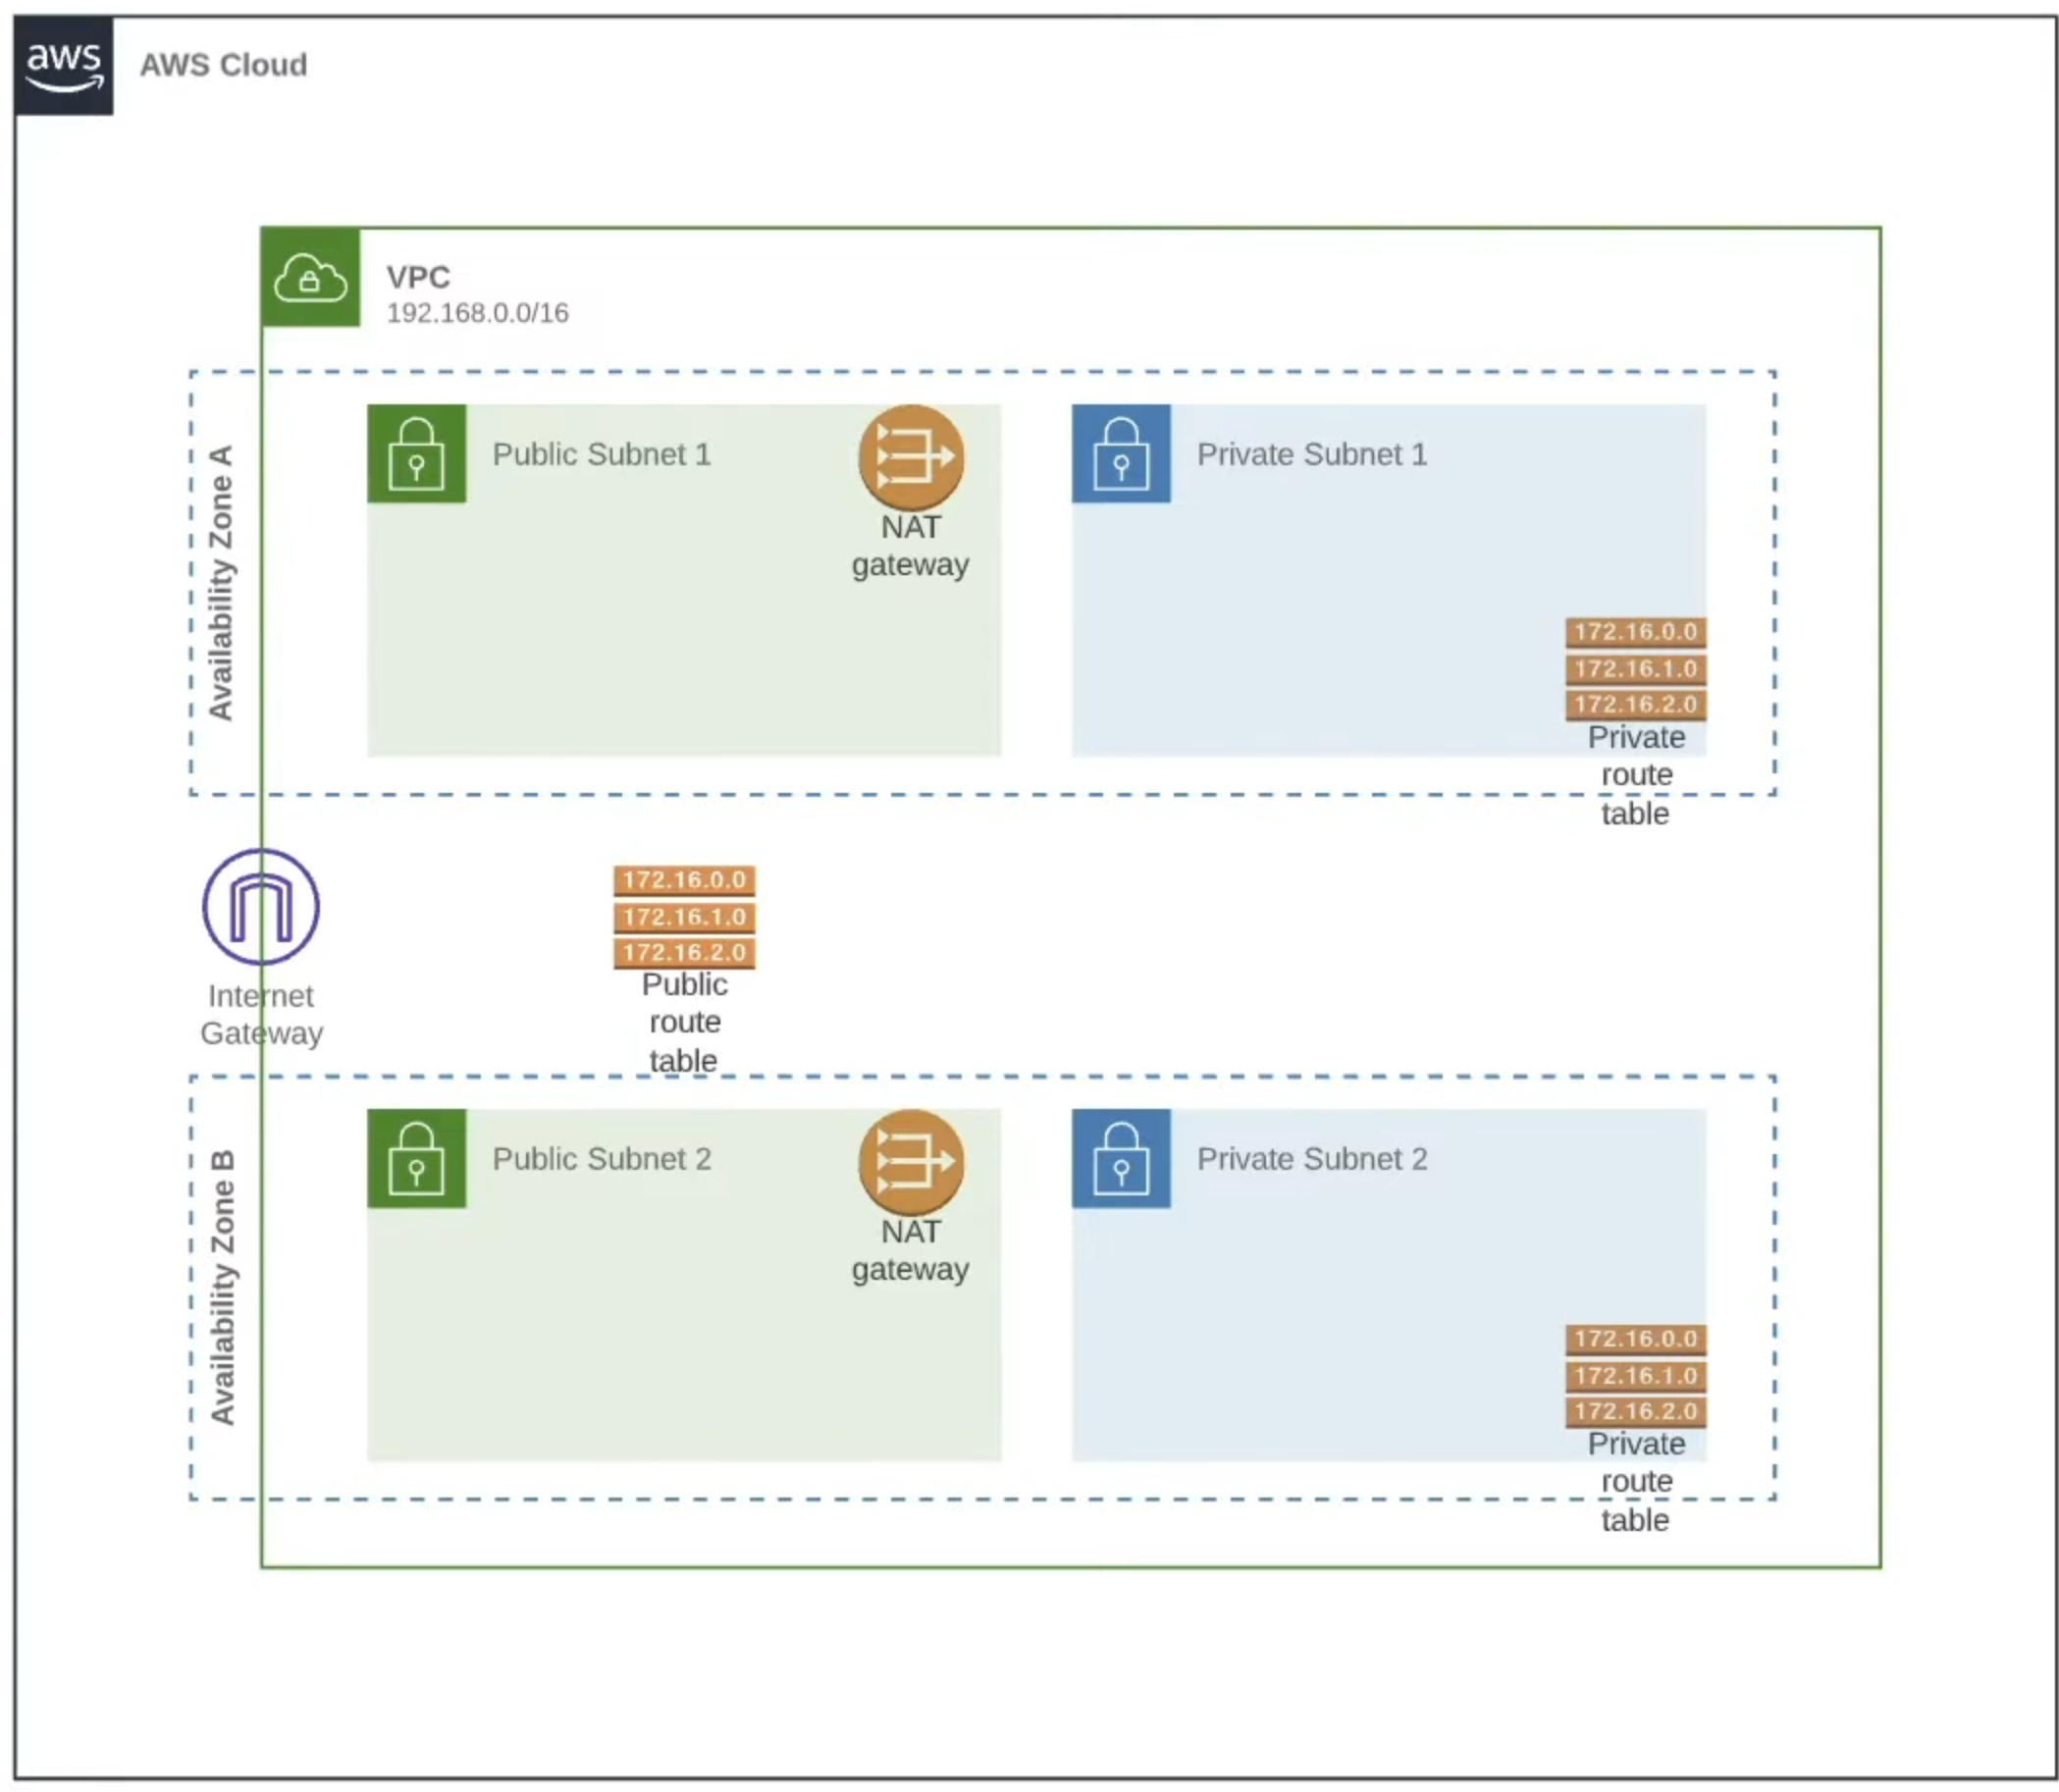
For this project we will deploy a highly available VPC on AWS by using Terraform code as IaC. After completing VPC deployment we will deploy EKS as our next project, so some configurations will be set specifically for EKS.The VPC will reside on two Availability Zone at eu-central-1. This VPC will have two public and two private subnets. Each public and private subnets will be deployed on different AZs, for maximum availability. This argument allows you to deploy your nodes to private subnets and allows Kubernetes to deploy load balancers to public subnets that can load balance traffic to pods running on nodes in the private subnets.
Project Architecture
Provider
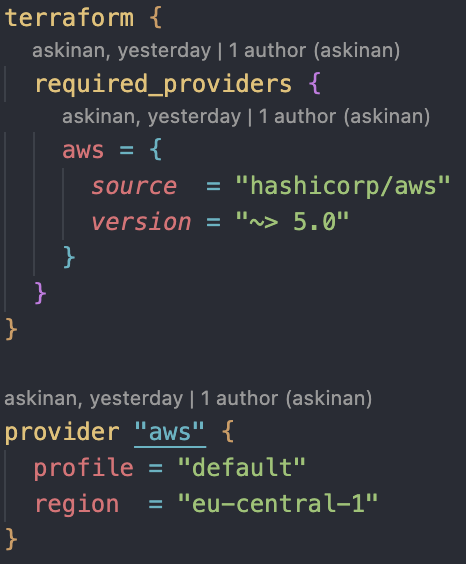
It is recommended for each production project to have a new user and user_group with least privileged access. Make sure the new user has programatic access. After creating new user, download it's credentials and add those credentials to your aws config by "aws configure --profile -profile_name-". If you do not use --profile option, the new user will will be configured as "default" profile.For terraform to interact our AWS account, firstly we need to create out provider.tf file. Create new file in your project as and add the aws provider.
VPC
After deploying a VPC, we will add the subnets with two different availability zones as described in the prologue. While creating VPC resource itself, you need to create a CIDR block, for example: cidr_block = "192.168.0.0/16". Further, dns support and hostnames argumentss should be marked true as they are necessary for EKS. After creating VPC resource, I also included a "vpc_id" output variable as we will use it to attach network elements like internet gateway and subnets to our VPC, "value = aws_vpc.main.id".Internet Gateway
Next, deploy an internet gateway to be able to communicate with outer world. It is fairly easy, you just need to mention the vpc_id to attach it to the VPC main. After that, we will create two public, two private subnets to sit on two seperate availability zones.Subnets
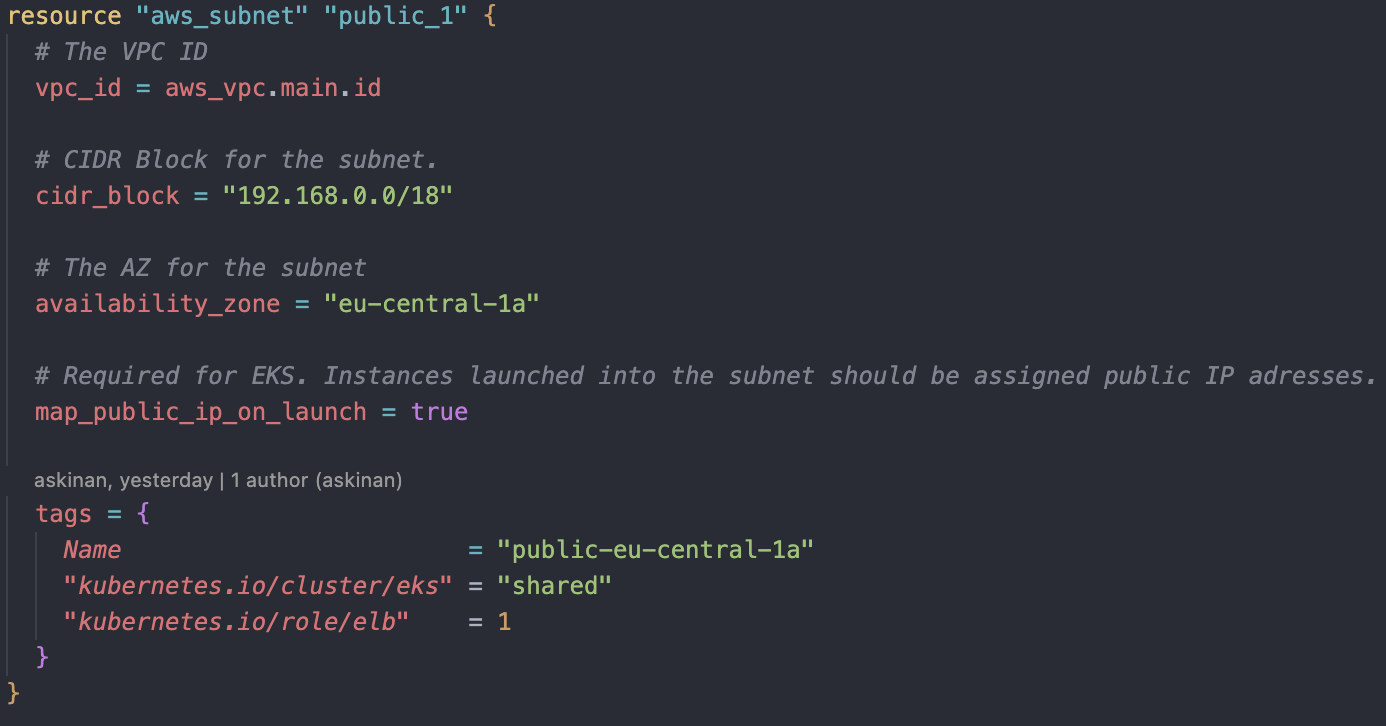
We will create a public subnet at first in eu-central-1a zone. We will mention a CIDR block which will be a part of our VPC CIDR "cidr_block = "192.168.0.0/18". An EKS required argument map_public_ip_on_launch = true will be included, which makes mandatory for instances launched into the public subnet to have public IP addresses. In our case, we will only use public subnets to deploy public Load Balancers on our next project. Lastly, we will mention a few tags which we will use later on for EKS. The argument "kubernetes.io/cluster/eks" = "shared" lets EKS to discover this particular subnet and use it. ""kubernetes.io/role/elb" = 1" argument is for EKS to be able to deploy load balancers to this public subnet. After all, our first public subnet looks like this:
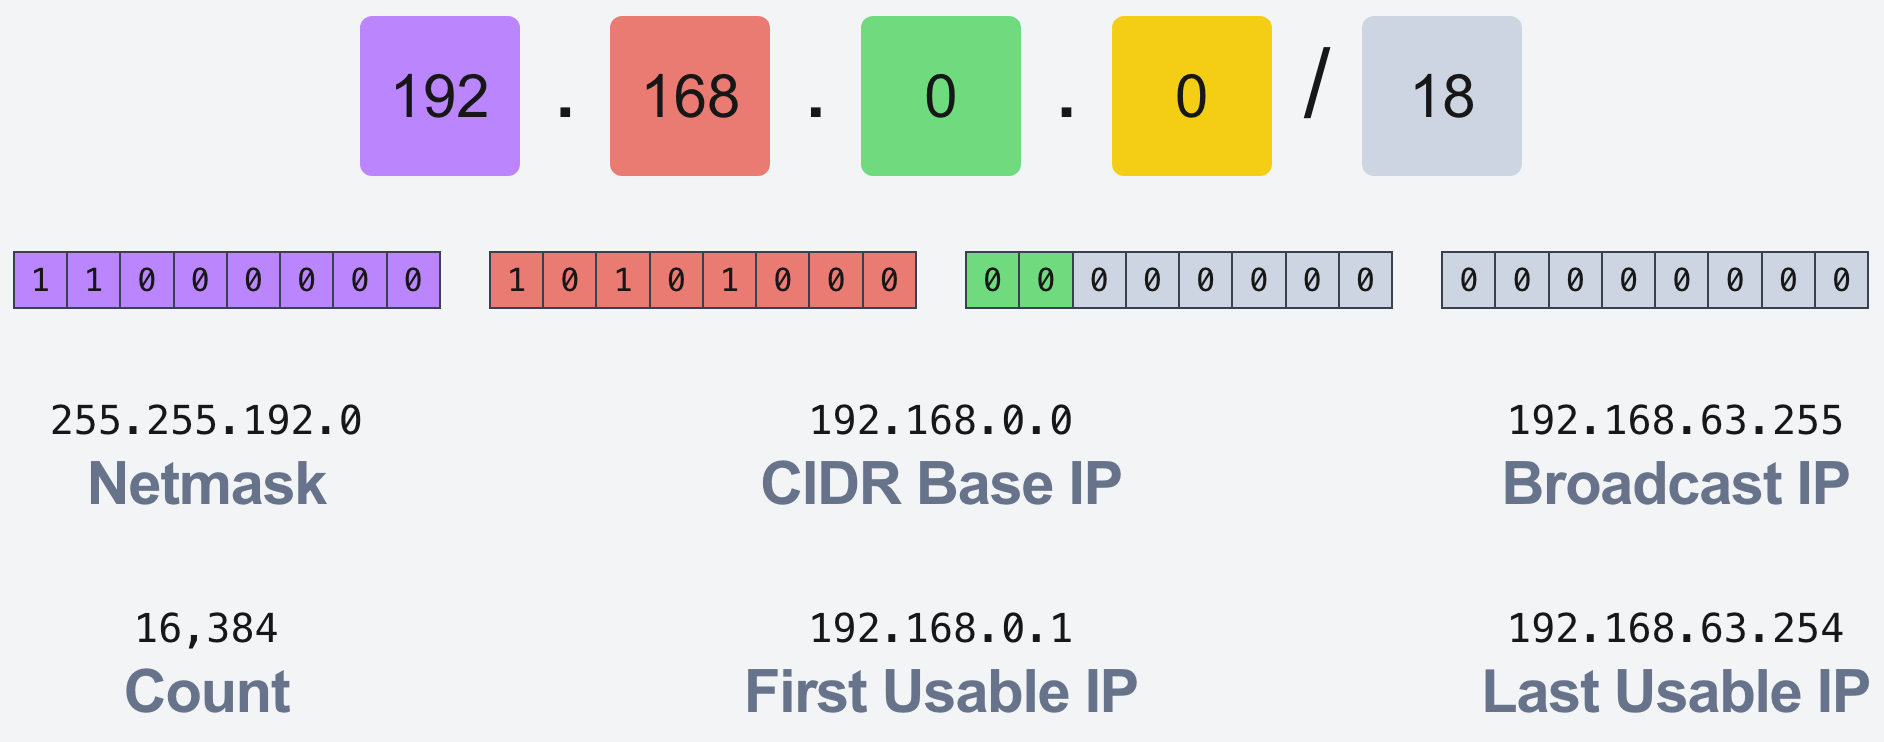
 Next we will deploy our second public subnet, mostly copying the first one but we need to change the CIDR block and change it's AZ to "eu-central-1b". The CIDR block will be "192.168.64.0/18" as our first subnet ends at "192.168.63.255". You can calculate the last IP of the CIDR block yourself or you can use websites like cidr.xyz to make that calculation for you but you need to make sure those CIDR blocks to not to intersect with each other.
 We will deploy two private subnets as well. They will look pretty much like public subnets but with few differences. First of all we will use next CIDR blocks to prevent intersection just as we did for public subnets. Private subnet1 will be in the same AZ with public subnet1, which is eu-central-1a, and private subnet2 will be in the same AZ with public subnet2, which is eu-central-1b. Elb-role will change to internal-elb.
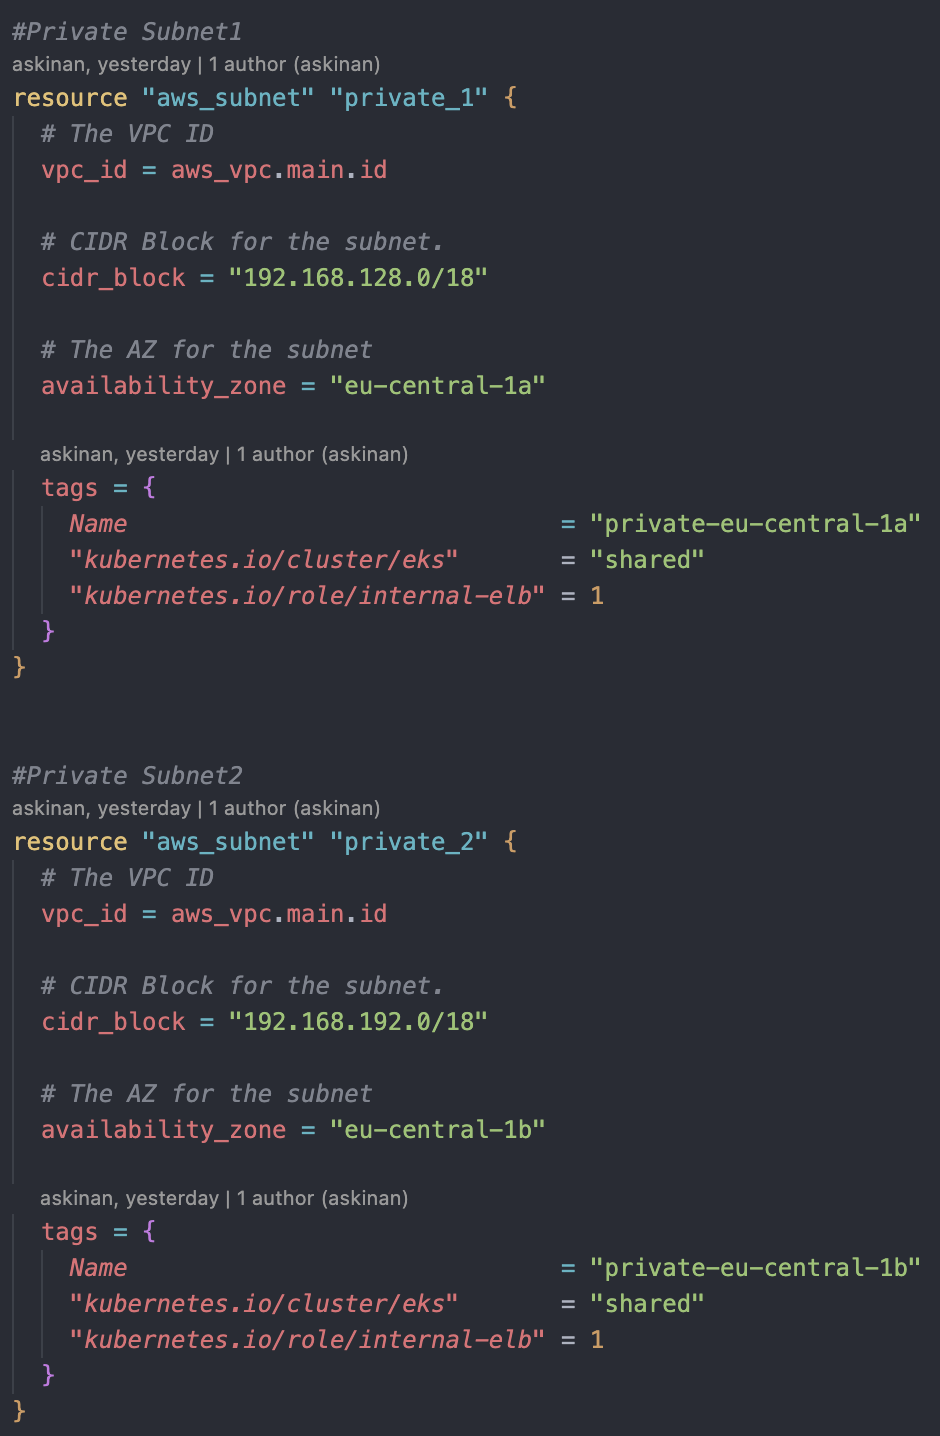 Right now, they are not really private and public subnets as their names state, we will need to create NAT Gateways and make the proper routing for them to determine their functionalities.
NAT Gateways
We will deploy two NAT Gateways to each for each AZs for high availability. Also we will assigned an elastic IP address for each of those NAT Gateways. First we create the Elastic IP Addresses. We need to 'depends_on = [ aws_internet_gateway.main ]' argument as the Elastic IPs should not be created prior to the creation of our IGW.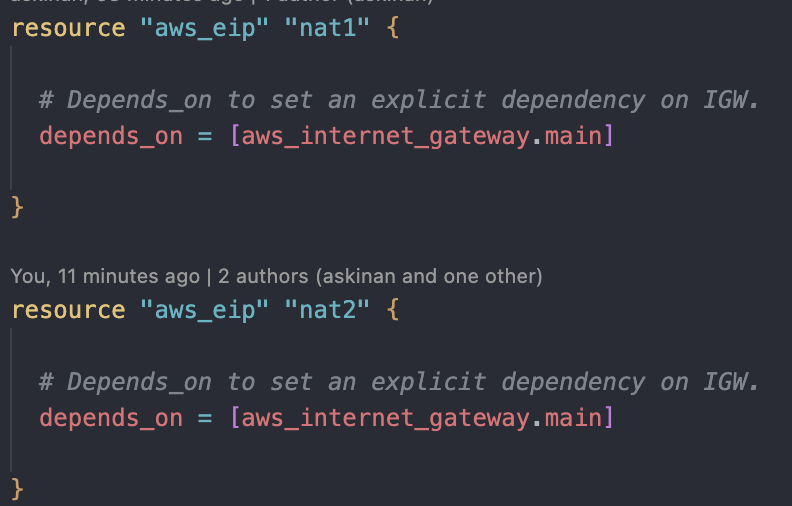 Secondly we will create two NAT Gateways on two availability zones. To attach our elastic IPs we will mention as "allocation_id = aws_eip.nat1.id".
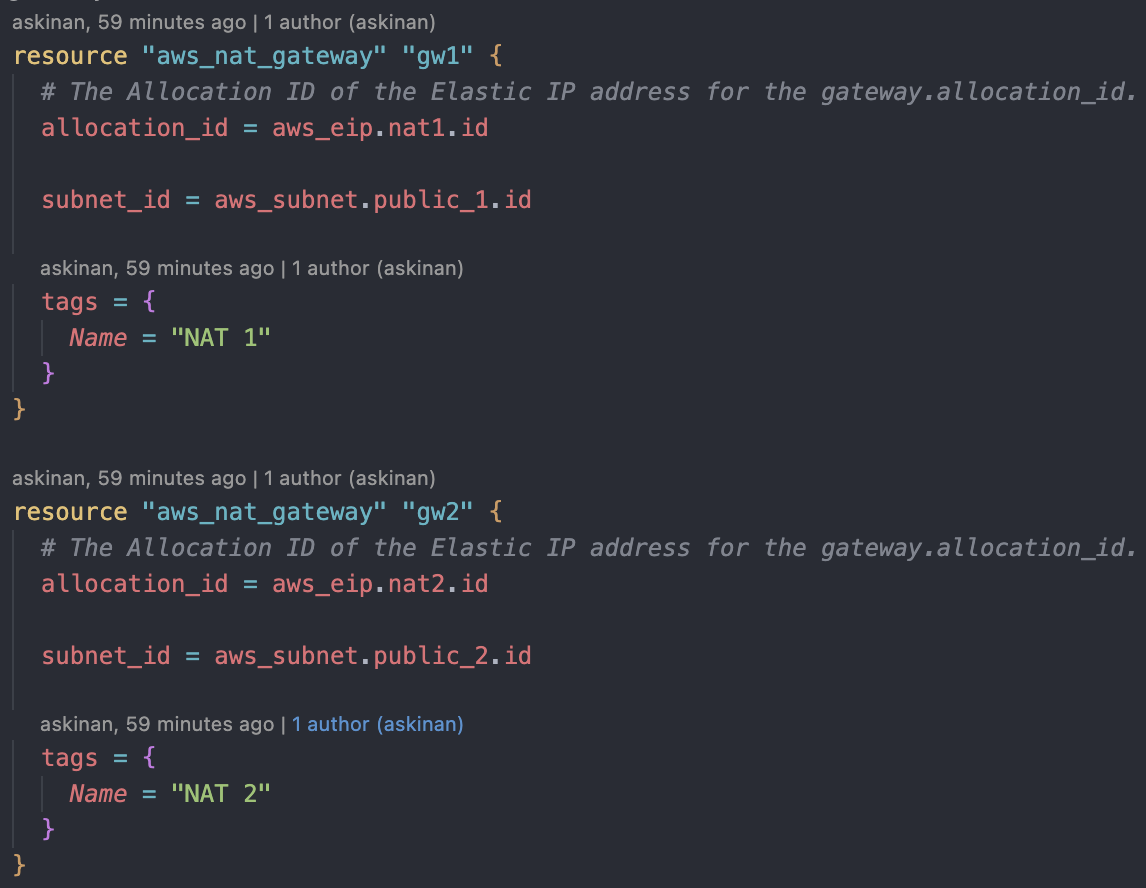 After deploying NAT Gateways and Elastic IPs, we should check them through the console and make sure those Elastic IPs are actually assigned.
Route Tables
In my opinion, creating the route tables with the correct routes is the most tricky part for this project. As first I deployed a VPC, it comes with a route table which is our main route.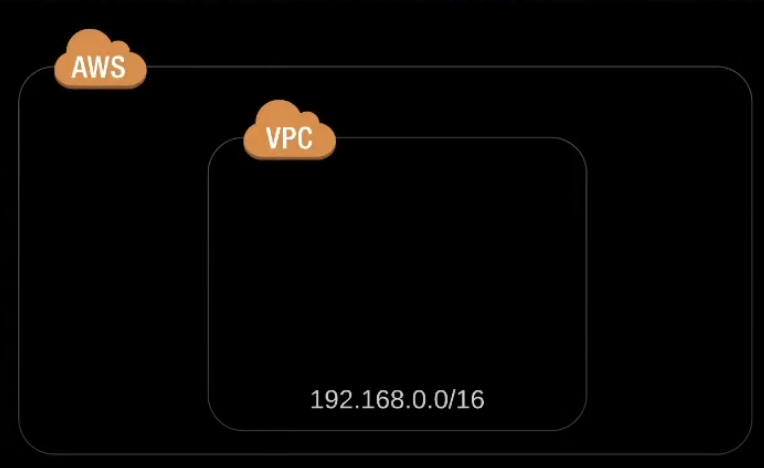 VPC's main route table (means that traffic won't leave your VPC)
 Other that this main route table we will have three more tables for public, private and VPC peering.
Public route table: It is the public route for our public subnets to reach internet gateway and to the internet.
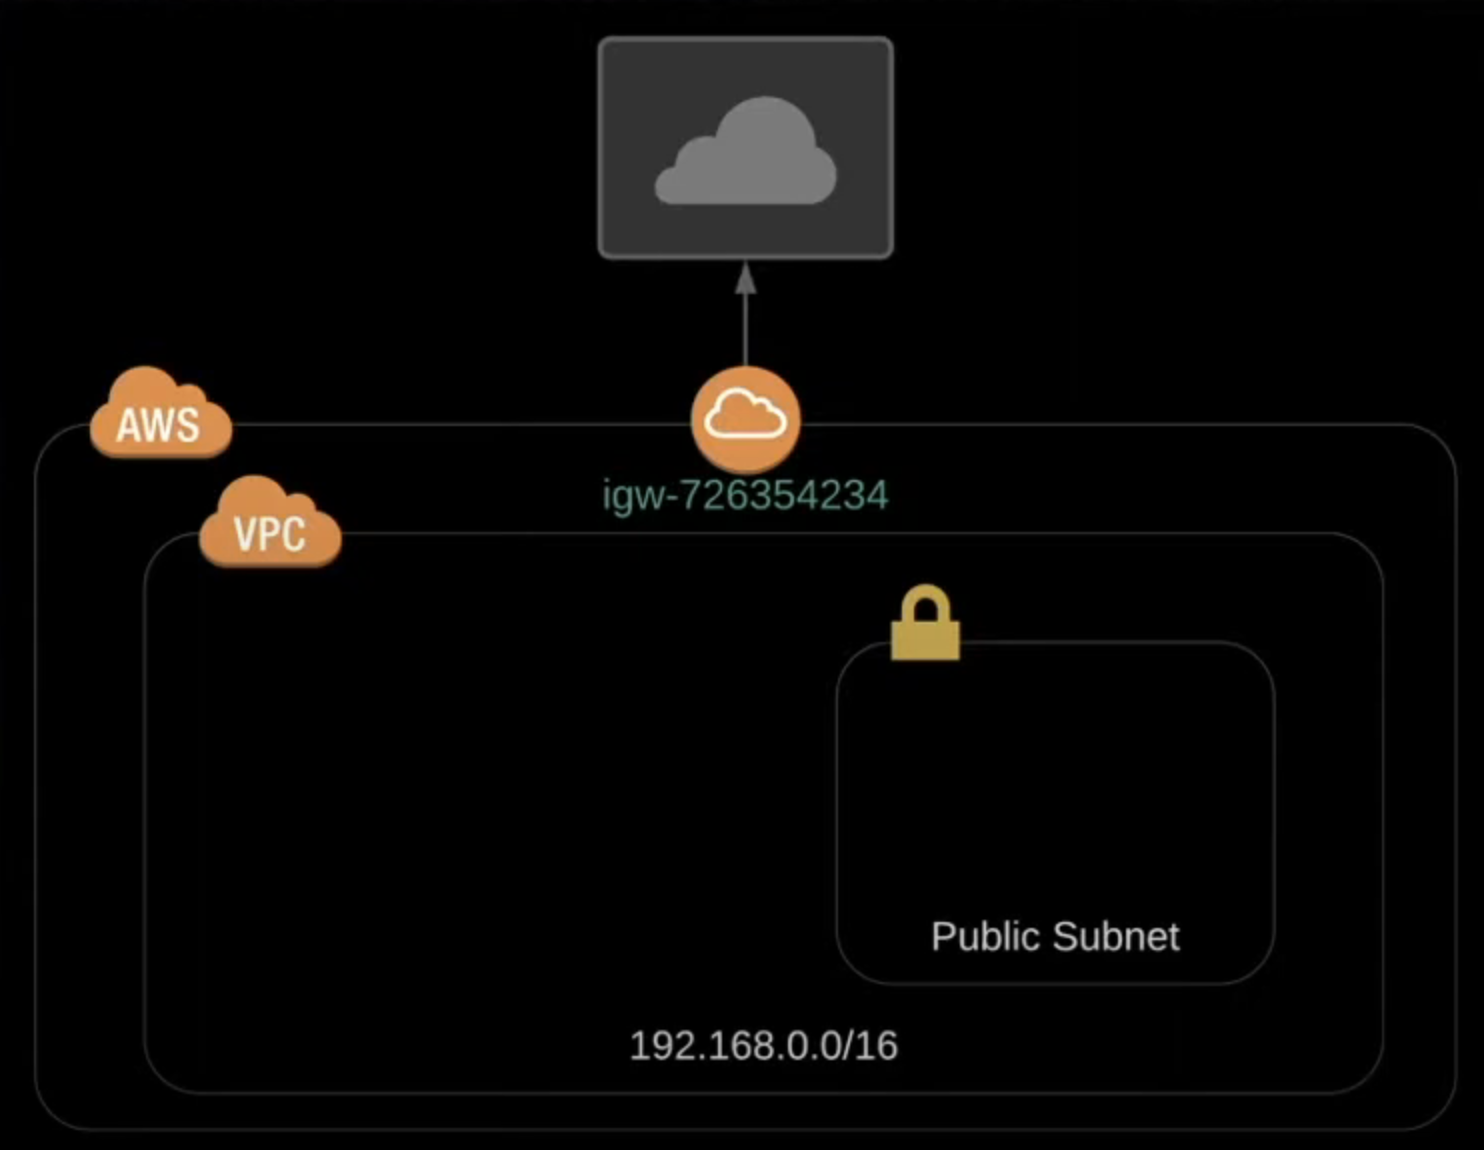
Public Route Table
This route table will be associate with our public subnets targeting our Internet Gateway. It for public subnets to reach out internet.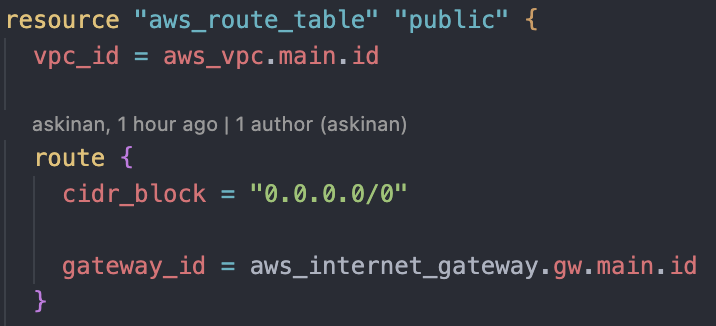
Private Route Table
These route tables will be associate with our private subnets, which will target separate NAT gateways for high availability.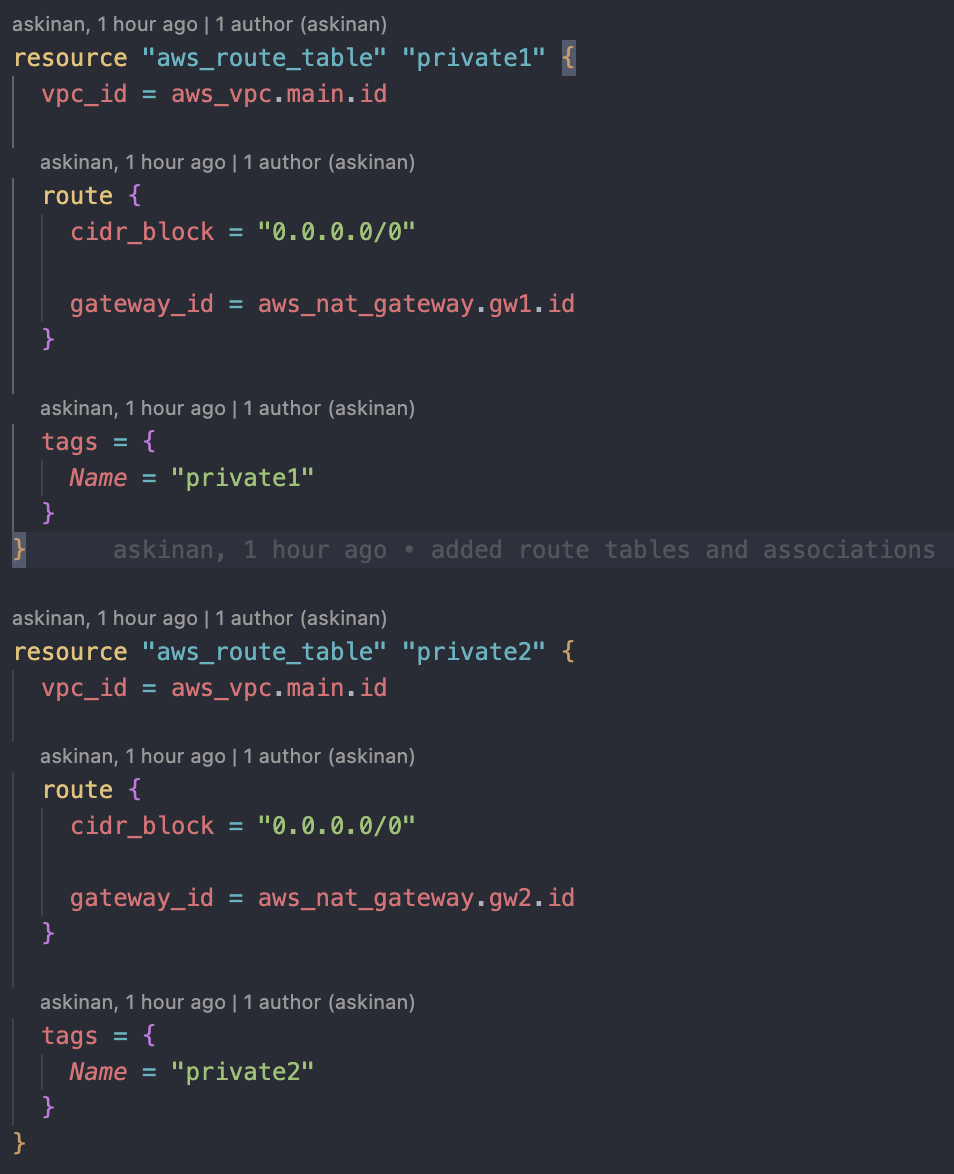 After deploying the route tables, check from AWS console that the VPC has to have total four routing tables, one as main route table, one for public subnets and two for private subnets.
Contact Me
I'm interested in new career opportunities. If you have any enquiries, feel free to contact me.
- E-mail:
- askin.inan@outlook.com
- Location:
- Istanbul, Turkey